


GarageBand has been one of the most popular software in the market since the day Steve Jobs initially launched it in 2004. As a special digital audio workstation for macOS and iOS, GarageBand allows you to record audio, mix rhythms, edit songs, and add sound effects. What’s more, it is easy to use and capable of editing content quickly. It has a lot of useful functions for regular musicians, regardless of what kind of instrument or genre you play. If you are not clear about how to add songs from Apple Music to GarageBand, this passage will provide you with a detailed explanation.
In this passage, we’ll show you how to download Apple Music songs for GarageBand and how to import Apple Music to GarageBand. If you are interested in this topic, please read this passage to explore more.
Part 1. Can You Use Apple Music in GarageBand?
Apple Music is a good place to get an excellent music source. With an Apple Music Premium subscription, you can easily download your favorite songs for offline listening. But as a matter of fact, tracks in Apple Music are all encrypted by a special AAC format. That means even if you’ve downloaded Apple Music songs offline, you can’t export them to any media player, including GarageBand unless you use an Apple Music converter to convert your Apple Music songs to open formats like MP3.
To convert Apple Music to MP3, you can use an all-in-one Tunelf Audio Converter. Here we listed the supported formats of GarageBand, Apple Music, and Tunelf. You can move on to the next part to learn how to use Tunelf to add Apple Music to GarageBand.
| GarageBand Supported Formats | MP3, AAC, WAV, AIFF, CAF, Apple lossless |
| Apple Music Audio Formats | Encrypted M4B (AAC) |
| Tunelf Supported Output Formats | MP3, WAV, AAC, FLAC, M4B, M4A |
Part 2. How to Download Apple Music for GarageBand
With the millions of songs in Apple Music, Apple limits its users to play their music using Apple devices. It is due to a DRM restriction encrypting the audio files. To some extent, this seems like a drawback since you cannot play Apple Music on any other device. But thanks to the Tunelf Audio Converter. The number one professional tool allows you to break the DRM restrictions on Apple Music in just a few clicks, enabling you to import music to GarageBand successfully.
Tunelf Audio Converter is an Apple Music Converter, which is designed to convert Apple Music, Audible books, and iTunes audio to open formats such as MP3, WAV, AAC, FLAC, M4B, and M4A with lossless audio quality. With this tool, you can convert and download Apple Music songs, playlists, and audiobooks to MP3 and save them on your computer as local files. In this way, you can export the converted songs to GarageBand with ease. additionally, Tunelf also preserves Apple Music tracks with ID3 tags. And its conversion speed is up to 30×. Don’t hesitate to try it!
Key Features of Tunelf Audio Converter
- Convert Apple Music to MP3, WAV, FLAC, AAC, and other audio formats
- Remove DRM from Apple Music, iTunes audios, and Audible audiobooks
- Preserve the converted audio with lossless audio quality and ID3 tags
- Support the conversion of audio format at a 30× faster speed in batch
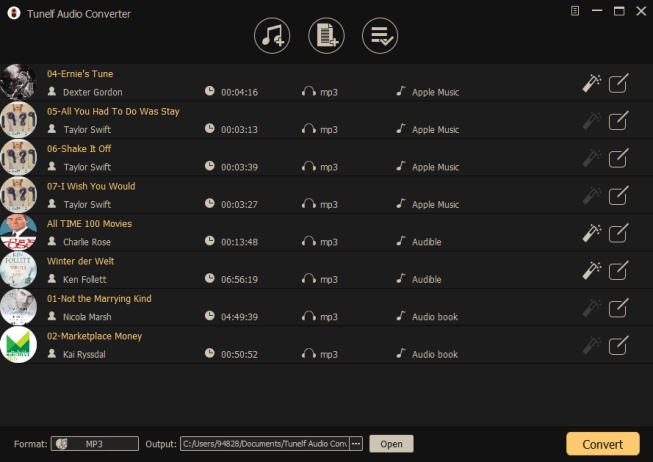
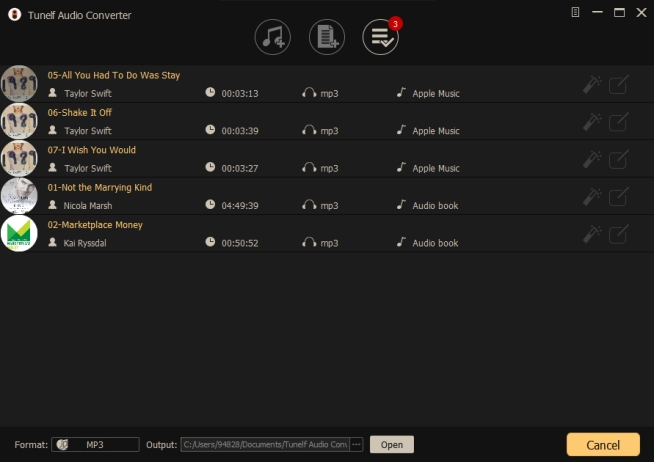
Step 1 Import Your Apple Music Files to Tunelf
Launch the Tunelf Audio Converter on your computer, and click the first Load iTunes Library icon on the screen. Then your downloaded Apple Music tracks will be presented on Tunelf. Choose the songs you want to add to GarageBand and click the Add button. Or you can drag and drop them from Apple Music to Tunelf.
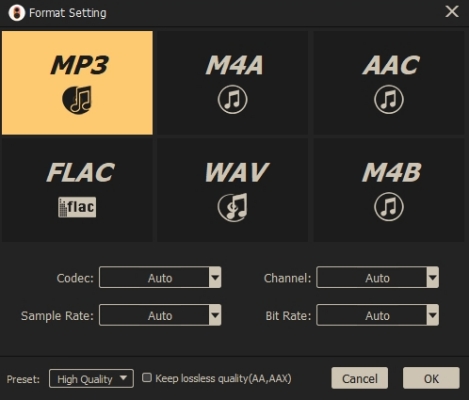
Step 2 Customize the Output Parameters
Here, there are several customizable settings that you can adjust. First, click on the Format icon and choose the desired output format. For our case, we usually select MP3 format since we want to import Apple Music to GarageBand. Other customizable settings are Codec, Channel, Bit Rate, and Sample Rate.
Step 3 Begin the conversion Process
It is the final step of using Tunelf. Hit the Convert icon, which is at the bottom right corner of your interface. The conversion process will fire up immediately. All the added songs will be converted to your chosen format in a few minutes. After conversion, you can click the Converted button to view all converted tracks.
Part 3. How to import Apple Music to GarageBand
Now that you have removed all the DRM restrictions from Apple Music, it is about time that you enjoy it from your Mac or iOS device. Create spectacular mixes of Apple Music with GarageBand.
Option 1. Add Apple Music Songs to GarageBand on Mac
Step 1. Launch the GarageBand app on your Mac.
Step 2. Open the Finder on your Mac, and find the location in which you saved your converted Apple Music audio files on your Mac.
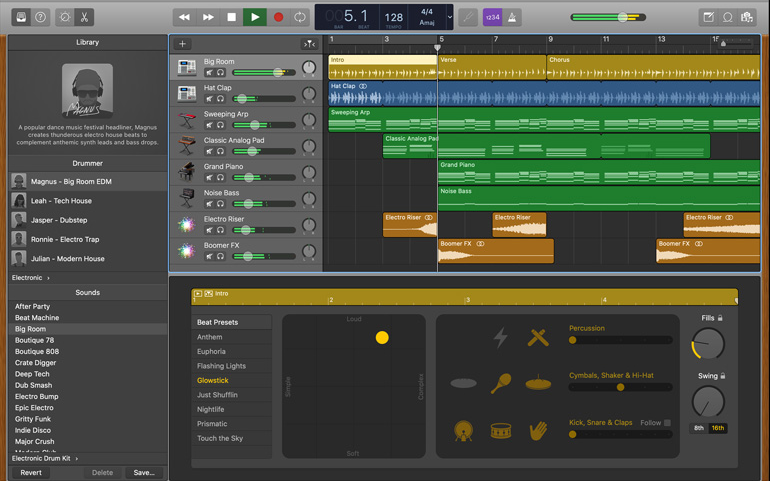
Step 3. Drag and drop the wanted tracks to the audio track editing area of GarageBand.
Option 2. Put Apple Music on GarageBand on iPhone/iPad
Here, your audio files are still on your computer and what you need is to import music to GarageBand, which is on your phone. You, therefore, need to sync the music to iTunes first before you import them to the GarageBand.
Step 1. Launch iTunes on your computer.
Step 2. Click File in the menu bar on the top of the screen, then choose Add File to Library. Choose the converted audio files to upload to your iTunes Library.
Step 3. Click Edit > Preferences > General, and select the iCloud Music Library option.
Step 4. Launch GarageBand on your iPad or iPhone device, and tap the Loop icon on the top right.
Step 5. Press on Files or Music to browse and add songs from Apple Music to GarageBand.

Part 4. More Useful Tips about GarageBand and Apple Music
Now that you know how to import Apple Music to GarageBand, you can move on to the next part: add GarageBand songs to Apple Music and make ringtones for Apple Music in GarageBand.
Tip 1. How to Add GarageBand Song to Apple Music
If you want to share the pieces you created in GarageBand, you may wonder how to add them to Apple Music. To add your GarageBand audio song to Apple Music, you’ll need your Mac to share it with the Music app and sync it to your iPhone or iPad.
Share a Song from GarageBand to the Music App on Mac
Step 1. Open GarageBand on your Mac, and go to the My Songs section.
Step 2. Select the song you want to share and click the Share button in the menu bar.
Step 3. Select Song to Music from the drop-down menu.
Step 4. Click Share to import the song to the Music app on your Mac.
Step 5. The shared song will appear under the Recently Added tab of the Music app.

Sync a Shared GarageBand Song to the Music App
Step 1. In the Music app, click Settings > General > check the Sync Library box.
Step 2. Connect your iPhone or iPad to your Mac via a USB cable.
Step 3. Go to Finder on your Mac and select the device from the sidebar.
Step 4. Click Music and check the Sync Music into [device’s name] box.
Step 5. Click Apply to start syncing your music.
Step 6. Then, the synced song will appear under the Recently Added in Music app on your device.
Tip 2. How to Make Apple Music Ringtone GarageBand
After you add the Apple Music song to the GarageBand app, you can make your own iPhone ringtones in GarageBand. Let’s see how to make it!
Step 1. Launch GarageBand on your iPhone or iPad, then tap the Loop icon > Files or Music.
Step 2. Drag and drop the song to the Tracks interface.
Step 3. Tap the Plus button and trim the song to the desired section.
Step 4. Tap the arrow-down icon to save it to My Song.
Step 5. Tap and hold the song to select Share, and select Ringtone.

Step 6. Name the ringtone and tap Export.
Step 7. Once the ringtone is exported successfully, tap Use sound as > Standard Ringtone. Now, the song is set as your ringtone on your iPhone.

Part 5. Conclusion
Don’t accept being limited in how you create, edit, and import music to GarageBand with less music. Apple Music has millions of songs that will enable you to make spending music. All you need to do is convert the Apple Music using Tunelf Audio Converter and then import music to GarageBand.
Get the product now:
Get the product now: