


With Apple Music, you can put thousands of songs in your music library for listening to anytime. Apple Music has become one of the highest-profile streaming music services on the planet with over 70 million songs, thousands of playlists, and daily selections from the world’s best music experts. To bring a better music experience, Apple Music has been constantly revolutionizing its service to all users.
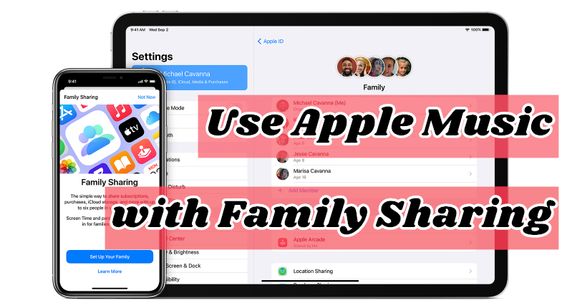
The advent of Family Sharing enables you to enjoy better service from Apple Music. It lets you and up to five other family members share access to amazing services including Apple Music. You and your family member can enjoy unlimited access to Apple Music on your devices with an Apple Music family subscription. So, how to use Apple Music with Family Sharing? Today, we’ll explore how to make you enjoy Apple Music Family Sharing on your device.
- Part 1. How to Use Apple Music with Family Sharing
- Part 2. How to Fix Apple Music Family Sharing Not Working
- Part 3. Alternative Method to Share Apple Music with Family
Part 1. How to Share Apple Music with Family Sharing
Each member of an Apple Music family subscription can stream millions of songs from the Apple Music catalog. And each family member gets their own personal music library, and music recommendations based on what they love to listen to. But before using Apple Music Family Sharing, you need to set up Family Sharing Apple Music first, and then start your journey with Apple Music.
How to Set Up Apple Music Family Sharing
First of all, you need to set up Family Sharing on your device. Then invite family members to join your family group. Now follow the below instruction to set up Family Sharing.
On your iPhone, iPad, or iPod Touch
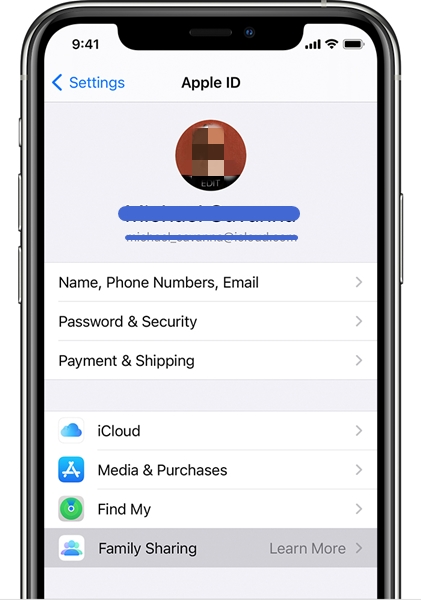
1) Navigate to tap the Settings tab on your iOS device and touch [your name].
2) Scroll down to choose Family Sharing, then tap Set Up Your Family.
3) Follow the onscreen instructions to set up your family and invite your family members.
4) Go back to Family Sharing and tap Add Member to enter your family member’s name or email address.
5) Choose to send an invitation via Messages or to invite them in person. After they accept an invitation to join Family Sharing, you can start using Apple Music Family Sharing.
On your Mac
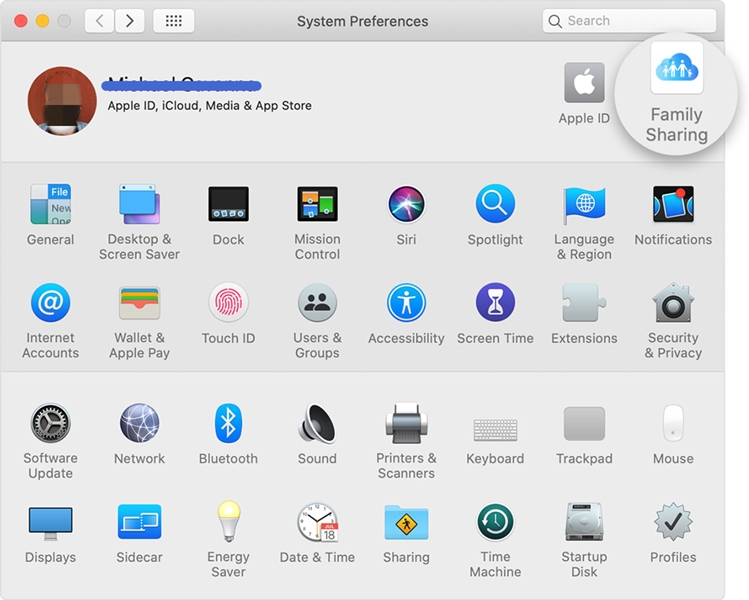
1) Go to Apple menu > System Preferences, then click Family Sharing.
2) Make sure that you want to use your Apple ID for Family Sharing, and check whether Share My Purchases is selected.
3) Follow the onscreen instructions to finish setting up Apple Music Family Sharing and go to invite your family member to join.
4) Click Apple menu > System Preferences again, then click Family Sharing.
5) Click Add Family Member, then follow the onscreen instructions to send your invitation. You can select that person’s name to see the status of the invitation.
1.2 How to Use Family Sharing Apple Music
After setting up Family Sharing, you can start to subscribe to Apple Music and choose Family Sharing for your account. Go to perform the below steps.
1) Open the Apple Music app or iTunes on your computer and go to Listen Now or For You.
2) Tap or click the trial offer (one trial per person or family) and choose Family, then tap or click Start Trial.
3) Sign in with the Apple ID and password that you use to make purchases.
4) Confirm your billing information and add a valid payment method.
5) Tap or click Join to start Apple Music Family Sharing on your device.
If you in the family group already has an individual or student subscription to Apple Music, just go to upgrade to Family Plan and confirm your purchase of a Family Plan upgrade. Then log in with your Family Sharing’s Apple ID to start using Apple Music.
Part 2. How to Fix Apple Music Family Sharing Not Working
However, in the process of joining Apple Music Family Sharing, you would find that the sharing feature doesn’t seem to be working well. You and your family member are unable to access your subscription to Family Plan. Don’t worry, though – we’re here to help.
#1. Verify the Apple ID used on your member’s device
The first thing you need to do is to make sure you and your family member are all using the same account on your devices when logging into Apple Music, iCloud, and iTunes. All of members joining your Family group must use the same ID so as to enjoy the feature of Family Sharing. So, you and your family members could go to verify the Apple ID on your Apple devices.
#2. Log out of Apple Music and iTunes and log in again
If you or your family members all already have an individual subscription to Apple Music, you need to try signing out of your original accounts on your devices, then signing back into Apple Music with your Family Sharing’s Apple ID.
#3. Remove your family members and add them again
If there still exists the problem after you and your family member check the Apple ID you used on your devices, you can try to remove your family members from your Family group and add them to the group again.
#4. Turn on the features you share with your family member
Family Sharing lets you and your family member share access to a series of Apple services like Apple Music, Apple TV+, Apple News+, and more. So, you could go to check whether you enable your Apple services shareable with your family members.
#5. Chat with Apple Support online and ask for help
When absolutely nothing else is working, you can turn to Apple Support. Just go to start your support request online, and then Apple will connect you to an expert. Then you can chat with Apple online and they will help you walk you through your problems.
Part 3. Alternative Method to Share Apple Music with Family
The feature of Family Sharing makes it easy to share your account with others, then you can enjoy the service from Apple Music together with your friends or family members by using one subscription. However, it’s important to note that if you want to share your downloads with others or listen to them on your other devices or players, it would be impossible to achieve.
Apple Music puts a restricted limitation on its music resource, which prevents the distribution and usage of songs from Apple Music. And that is why you cannot freely use your downloads on your devices or share them with others. Thankfully, a tool such as Tunelf Audio Converter – a top-notch audio converter for Apple Music – could help you remove DRM from Apple Music and convert Apple Music songs to MP3.
Key Features of Tunelf Audio Converter
- Convert Apple Music to MP3, WAV, FLAC, AAC, and other audio formats
- Remove DRM from Apple Music, iTunes audios, and Audible audiobooks
- Preserve the converted audio with lossless audio quality and ID3 tags
- Support the conversion of audio format at a 30× faster speed in batch
Step 1 Select Apple Music Songs You Want to Share
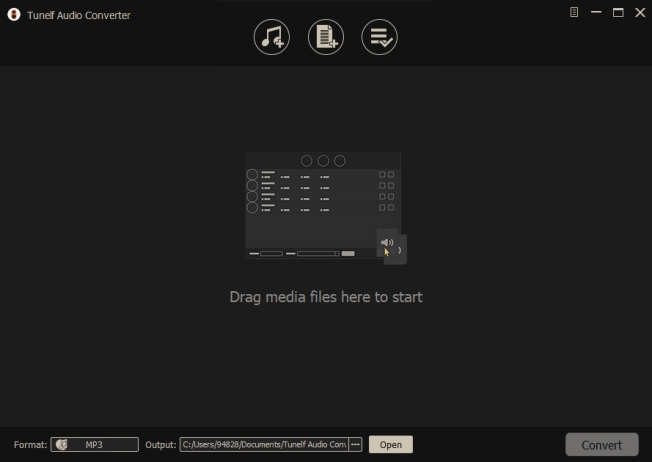
First of all, you’ll need to install Tunelf Audio Converter on your computer. Then launch the software and it will load Apple Music automatically. Note that all songs from Apple Music can be converted by Tunelf Audio Converter but you need to download them from Apple Music to your computer first. Now select songs you want to transfer and add them to the conversion list by drag-and-drop.
Step 2 Go to Set Output Parameters for Apple Music
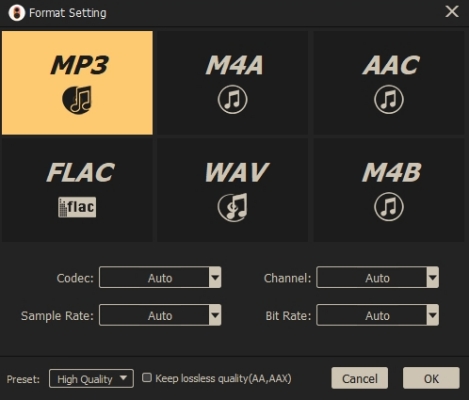
Next, go to select the audio format and set the output parameters by clicking the Format panel. In this window, you can select the MP3 option from the list of audio formats. From there, you can also set the bit rate, sample rate, codec, and channel for getting better audio quality. Once you’re satisfied with your settings, click the OK button, and then go back to the interface of Tunelf software.
Step 3 Start to Convert Apple Music Playlists to MP3
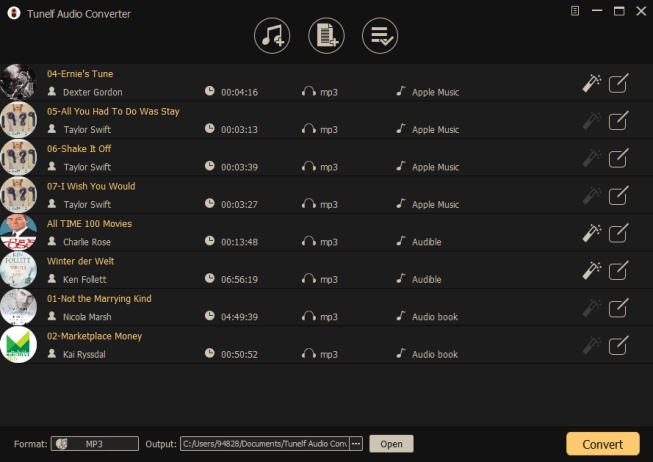
Click the Convert button on the bottom right corner to initiate the conversion of Apple Music songs. When the conversion process finishes, your files will be saved to your default downloads folder. By clicking on the Converted icon, you’ll navigate to browse the converted Apple Music songs in the history list. Now you can prepare to transfer Apple Music playlist to Google Play with ease.
Conclusion
You can easily share your subscription by adding your family members to your Family Sharing group, so you can listen to music on with one subscription. If you cannot use this feature, you could try the above troubleshooting tips. Whether you want to share music with more friends and family members or listen to Apple Music on any device, it is a piece of cake for Tunelf Audio Converter.