


Since Apple decided to develop its streaming business, you are not able to use iTunes with macOS Catalina anymore. Your music, videos, podcasts, and audiobooks are organized into their own dedicated apps — Apple Music, Apple TV, Apple Podcasts, and Apple Books. However, if you have a PC, you can continue to use iTunes for Windows to manage your media library and make purchases. Although you can use iTunes to manage your media library on a PC, you would find that all of your music, videos, podcasts, and audiobooks in the library cannot be played out of iTunes. To make your audio files from the iTunes library playable on other devices or players, the best method is to export the iTunes library to an external hard drive. It is possible to move iTunes library to external hard drive? Keep reading and you will know the answer.

Part 1. Can You Move iTunes Library to External Hard Drive?
I have my iTunes library stored on the internal library on my PC. I want to move the entire library to an external hard drive while keeping my existing genre structure. I can’t seem to figure how to do it. The iTunes help menu appears to suggest that I can have any new stuff that I get put on the external drive but I can’t move the old stuff. Is this true?
— User from the Apple CommunityiTunes is a great database to store and manage your media files. If it takes up too much space on your computer, you should consider moving your library to an external hard drive. More so, backing up your iTunes library to an external hard drive is the best method to keep your collection in case there is something wrong with the iTunes app. Thus, some of you may have the same question as the user above. Can you move your iTunes library to an external hard drive? Fortunately, the answer is positive.
If you don’t know how to do that, this post will provide you with a detailed tutorial that contains all the exact steps. You can follow them gradually on your devices to move your iTunes library. What’s more, the ultimate method to download and back up your library is offered in Part 3. You can check the content you need in the following parts easily and follow them to achieve your goal effectively. Let’s explore the valid methods together!
Part 2. How to Move iTunes Library to External Hard Drive
With the iTunes app on your desktop, you can directly transfer your library to an external hard drive. Before moving your library, it’s a good idea to back up your data and make a full preparation. Check the below list to make sure that you are prepared. Then, just follow the three steps to begin your moving process.
Require
A valid external hard drive
A compatible USB cable
The latest version of the iTunes app on your computer
Preparations:
1. Launch iTunes on your computer and sign in with your Apple ID.
2. Open the advanced settings. For Windows users, choose Edit > Preferences > Advanced. If you are using a Mac, you should click the iTunes menu icon and then choose Preferences > Advanced.

3. Toggle on the check box before “Keep iTunes Media Folder organized” and “Copy files to iTunes Media folder when adding to library”.

4. Pay attention to the iTunes Media folder location section at the top. It shows where your iTunes library is stored on your computer and you should remember that path.
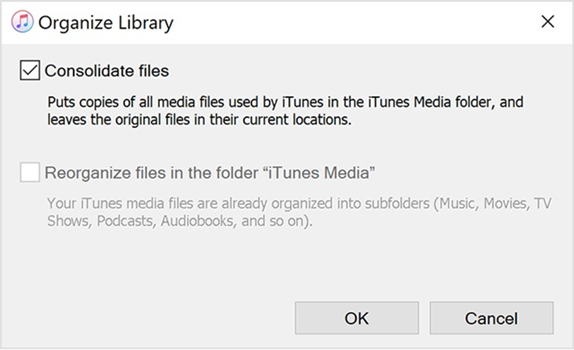
Step 1 Consolidate Your iTunes Library
1) From the menu bar at the top of your computer screen or at the top of the iTunes window, choose File > Library > Organize Library.
2) Select Consolidate files then click OK.
Step 2 Move iTunes Library to an External Hard Drive
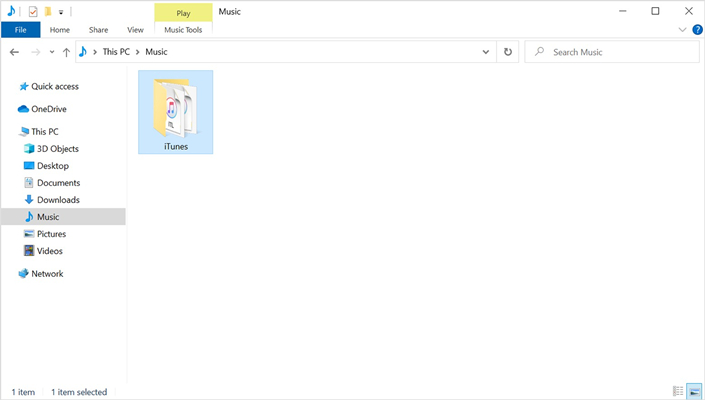
According to the path on iTunes Media folder location, you need to find the iTunes folder on your desktop. The default locations are usually: Users/ Your Username/ Music/ iTunes/ iTunes Media. Then, you need to connect your external hard drive to your computer via a compatible USB cable. If necessary, you can create a new folder on your external hard drive to store your iTunes library.
1) Quit iTunes and choose your iTunes folder.
2) Right-click on your iTunes Media folder, then choose Copy.
3) Go to your external hard drive, then right-click and choose Paste. Thus, the iTunes folder can be moved to your external hard drive.
Step 3 Redirect iTunes Library to the New Location
After moving your iTunes library to an external hard drive, you need to redirect and set a new path for the iTunes app, letting it search for content on the external hard drive instead of your local drive.
1) Launch the iTunes or Music app and press the option key at the same time. Hold it until there is a new window pops out.
2) In the new window, click Choose Library. Then, select your external hard drive as the device.
3) Next, select iTunes > Open.
Part 3. How to Back up iTunes Library to External Hard Drive
Due to the specificity of iTunes media, it is not easy to complete the transfer of the iTunes library to the external hard drive. For commercial protection purposes, all the music from iTunes is protected by digital rights management. Thus, you are not allowed to move them to other places for playing. No matter whether you purchase music from iTunes or add your favorites from Apple Music to iTunes library, in fact, you don’t own these music tracks. You are only allowed to listen to your iTunes library on a device with the Apple Music app. Sometimes, when you try to back up the iTunes library to an external hard drive, a prompt will pop up to tell you that you can not export protected files. So, you can only use a third-party tool like Tunelf Audio Converter to process.
Tunelf Audio Converter is a powerful and professional audio converter that is developed for the conversion of special audios like iTunes audios and common audio files to six popular audio formats, including MP3, WAV, AAC, FLAC, M4B, and M4A. You can use it to download audiobooks from Audible to your local computer as well. It ensures your listening experience by retaining all the ID3 tags and original sound quality. The best thing is that you can even reset the audio settings depending on your needs. Here’s a detailed rundown of all the features of Tunelf Audio Converter.
Key Features of Tunelf Audio Converter
- Convert Apple Music to MP3, WAV, FLAC, AAC, and other audio formats
- Remove DRM from Apple Music, iTunes audios, and Audible audiobooks
- Preserve the converted audio with lossless audio quality and ID3 tags
- Support the conversion of audio format at a 30× faster speed in batch
Tunelf Audio Converter offers different versions for Windows users and Mac users. You should download and install the version you need. Then, simply follow the steps below to back up your iTunes library easily.
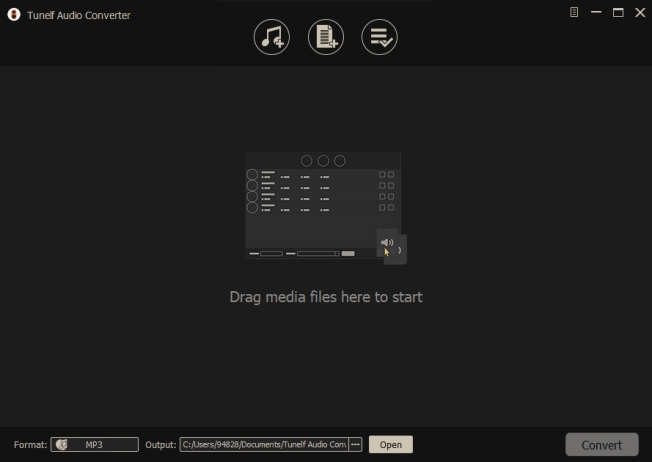
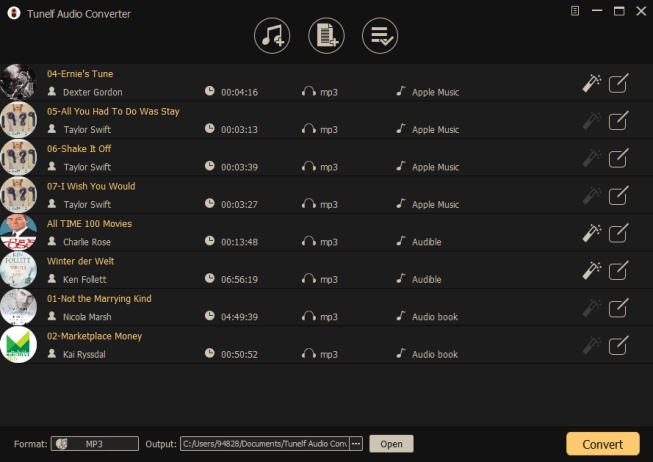
Step 1 Add iTunes library to Tunelf’s interface
First of all, install Tunelf Audio Converter on your computer. Then launch the software and it will load the Apple Music app or iTunes app automatically. Note that all songs from iTunes can be converted by Tunelf Audio Converter but you need to make sure that your iTunes audios can be played on your computer first. Now select songs you want to transfer and add them to the conversion list by drag-and-drop.
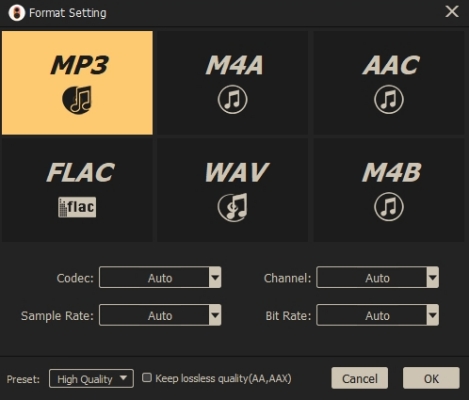
Step 2 Set the output audio format as you wish
Next, go to select the audio format and set the output parameters by clicking the Format panel. In this window, you can select the MP3 or other options from the list of audio formats. From there, you can also set the bit rate, sample rate, codec, and channel for getting better audio quality. Once you’re satisfied with your settings, click the OK button, and then go back to the interface of Tunelf software.
Step 3 Start downloading iTunes library for backup
Click the Convert button on the bottom right corner to initiate the conversion of songs from the iTunes library. When the conversion process finishes, your files will be saved to your default downloads folder. By clicking on the Converted icon, you’ll navigate to browse the converted songs in the history list. Now you can prepare to transfer your songs to the external hard drive. If you want, you can also import them to other devices for offline listening.
Conclusion
Keeping with the simplistic methods introduced in the post, it’s easy to export unprotected or protected iTunes music to the external hard drive. If you have purchased lots of music tracks from iTunes, it’s time to process the transfer of the iTunes library to an external hard drive. If you want to enjoy iTunes music on any device you like and get the most out of your iTunes library, Tunelf Audio Converter can do you a favor.
Get the product now:
Get the product now: