


When it comes to editing your videos, you need outstanding video editing software. And nothing beats a good video than adding some nice background music. Here is where Spotify music matters. Spotify music will seamlessly fit into your video, especially if your option is Final Cut Pro. Originally designed by Macromedia, Final Cut Pro has continued to grow into a pro editing giant. That’s why should not miss adding Spotify music to Final Cut Pro for an awesome video finish.
As with most video editing applications like iMovie and CapCut, Final Cut Pro is encompassed with additional programs like Compressor Expand Editor and many more to enable you to create eye-catching visual effects. Besides, there is no point in being glued to work chronologically from start to end. With Final Cut Pro, everything is digital hence you can drag, trim, and alter your Spotify playlist and other effects, in real-time. Let’s see how to add Spotify music to Final Cut Pro.
Part 1. Can You Use Spotify Music in Final Cut Pro?
No, you cannot directly use Spotify music in Final Cut Pro due to several reasons. The HiFi sound quality is what drives many users to add music from Spotify to Final Cut Pro as the background music. However, neither free users nor premium subscribers can apply Spotify music to any video editing software.
Tool Required for Adding Spotify Music to Final Cut Pro
The music from Spotify is not viewable in Final Cut Pro even though you have downloaded Spotify music with a premium subscription. And it’s all about the format. Well, Spotify is known for its encryption technology that ensures users listen to its music only from the Spotify app or the Spotify Web Player. You, therefore, have to first download and convert Spotify music to a viewable format, then you can add Spotify music to any video editing software like Final Cut Pro.
Fortunately, there is a tool that can break all the limitations of adding Spotify music to Final Cut Pro. With Tunelf Spotify Music Converter, you can download and convert music from Spotify to the most popular audio formats like MP3, FLAC, WAV, AAC, M4A, and M4B. In the process of converting Spotify music from OGG Vorbis to other formats, Tunelf software will completely remove DRM protection from Spotify. This best tool will easily download Spotify music to make it playable in Final Cut Pro.

Key Features of Tunelf Spotify Music Converter
- Download Spotify playlists, songs, and albums with free accounts easily
- Convert Spotify music to MP3, WAV, FLAC, and other audio formats
- Keep Spotify music tracks with lossless audio quality and ID3 tags
- Remove ads and DRM protection from Spotify music at a 5× faster speed
Spotify and Final Cut Pro: Audio Compatibility
As we mentioned above, the reason why you cannot use Spotify music in any video editing software is the format. Spotify music is encoded in the format of OGG Vorbis, while Final Cut Pro only supports a part of unprotected audio files. By using Tunelf Spotify Music Converter, you can complete the task of using Spotify music in any video editing software. Currently, you can import and work with the following audio formats in Final Cut Pro.
| Spotify Music Format | Protected OGG Vorbis |
| Final Cut Pro Supported Formats | AAC, AIFF, BWF, CAF, MP3, MP4, RF64, and WAV |
| Tunelf Software Output Formats | MP3, FLAC, WAV, AAC, M4A, and M4B |
Part 2. How to Convert Spotify Music for Use in Final Cut Pro
After knowing which tool can help you complete the task, you can try to download music from Spotify for use. The steps of using Tunelf Spotify Music Converter to download Spotify music are easy. Now follow the below steps to download and convert Spotify music for use in the video.
Step 1 Import Spotify Playlist to Tunelf Software
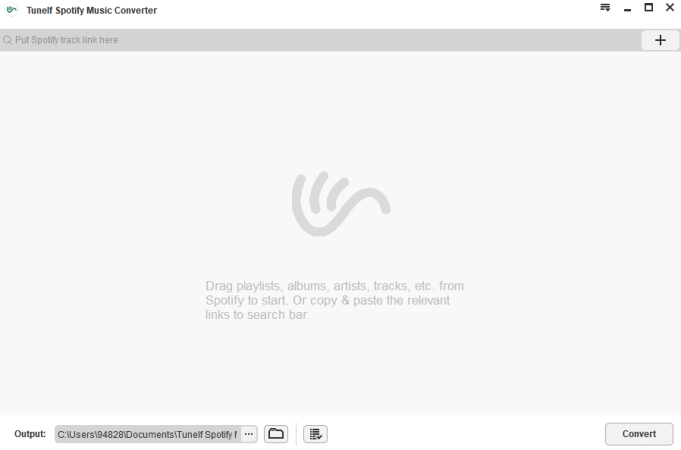
Launch Tunelf Spotify Music Converter on your computer, then the Spotify app will also load immediately. It’s now time to check out for your favorite music from the Spotify app. Then go to Your Library and peruse the songs you need to add to Final Cut Pro. Drag and drop the music to the Tunelf interface or copy the relevant links and paste them to the search bar on the converter.
Step 2 Configure the Output Audio Parameters
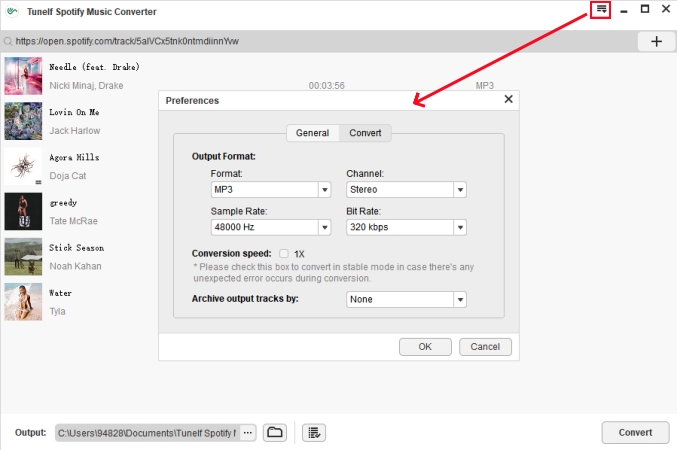
To customize the output parameters, click the menu bar > Preferences > Convert and set the channel, bit rate, sample rate, and format. As Final Cut Pro only supports a part of audio formats, you can select MP3, AAC, or WAV as the output format. You can also change the conversion speed to up to 5×. Otherwise, check the box at 1× to convert in a more stable mode if you realize unexpected errors occurring during conversion.
Step 3 Start to Convert Spotify Music to MP3
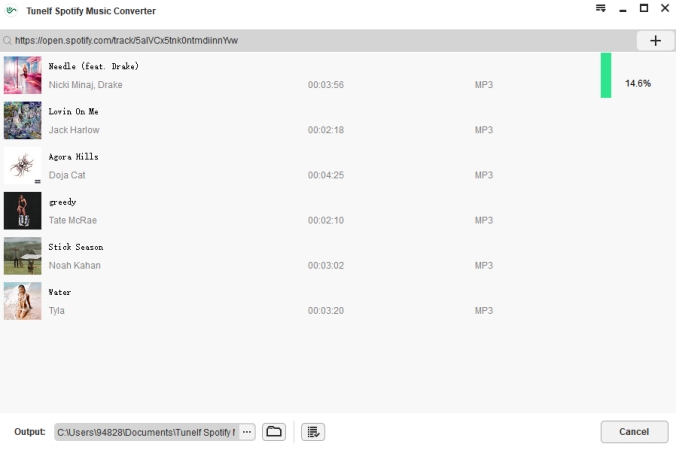
Confirm whether the settings are completed, and then click the Convert button to begin to download Spotify music to MP3 files. Tunelf software will then save your selected Spotify songs and playlists to your computer. Check in the converted list for the Spotify music by clicking the Converted icon. In the conversion history, you’ll find all the converted Spotify music and locate the converted folder.
Part 3. How to Add Spotify Music to Final Cut Pro for Mac
Once you have access to the folder containing the converted Spotify music files, you are just an inch away from adding the supported format to the editor. There are two options for you to add your music files to Final Cut Pro. You can import music from your Music Library in Apple Music or from the Finder on your Mac. Here’s how to.
Option 1. Import into Final Cut Pro from Apple Music
Step 1 Upload Spotify Songs to Apple Music
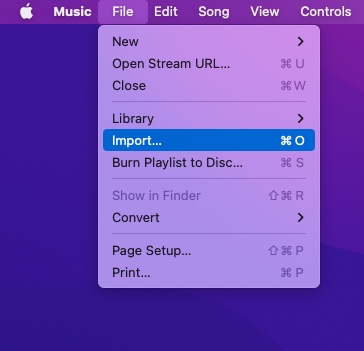
Open the Music app on your Mac and click File > Import. Then head to the folder containing the converted Spotify music files and select items you want to use as the background music. Continue to click the Open button to upload your Spotify music files to your music library.
Step 2 Open the Photos, Videos, and Audio Sidebar
Start your project in Final Cut Pro and click the Photos, Videos, and Audio button in the top-left corner of the Final Cut Pro window. Or choose Windows > Go To > Photos, Videos, and Audio to open the sidebar.

Step 3 Choose to Add Music to Final Cut Pro
From the Photo, Videos, and Audio sidebar, click Music to browse Spotify songs you’ve uploaded into your music library in the Apple Music app. You can use the pop-up menu at the top of the browser to filter Spotify songs shown in the browser.

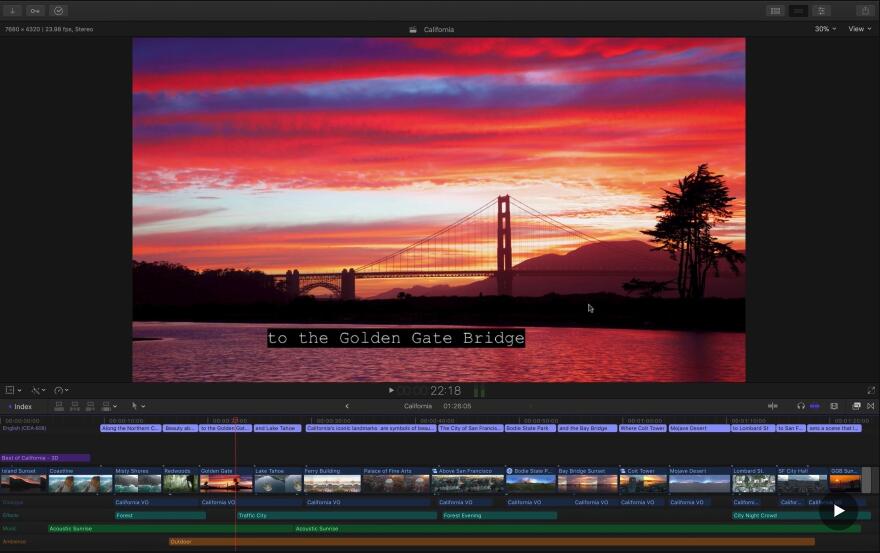
Step 4 Add Spotify Music to the Timeline
Preview and select a Spotify song. Then drag the music to the timeline of your project. After adding the music, you can adjust the music according to the timeline. Also, you can apply some effects to the music in your project.
Option 2. Import into Final Cut Pro from the Finder
Step 1 Open a Project in Final Cut Pro
Start your project in Final Cut Pro and click the File button from the menu bar. Then from the drop-down window, click Import and select Media.

Step 2 Upload Music to Final Cut Pro
From the pop-up browser, find the folder where you store the converted Spotify music files. Then select some music files you want to use in the project and click the Import All button.

Step 3 Add Spotify Music to the Timeline
Go back to the Final Cut Pro window and click the Songs button in the left column. Here you can find all the uploaded songs and drag one into the timeline of your project.
Part 4. How to Use Spotify Music in Final Cut Pro for iPad
Final Cut Pro is compatible with Apple devices including Mac and iPad. If you have an iPad and want to edit your video project with Final Cut Pro, you can also add Spotify music to the video as the background music. Follow these steps to add Spotify music to your project on an iPad.

Option 1. Import into Final Cut Pro from Apple Music
Step 1 Upload Spotify Music to iTunes or Apple Music
Launch iTunes or Apple Music on your computer, then go to create a playlist by clicking File > New > Playlist. Go to drag your converted Spotify music files into the playlist.
Step 2 Add Music to Video in Final Cut Pro
In Final Cut Pro for iPad, open your project or create a project. Then tap the Media button, then go to Soundtracks. Just choose a Spotify song you’ve uploaded to Apple Music and add it.

Option 2. Import into Final Cut Pro from the Folder
Step 1 Import Spotify Music from Mac to iPad
Connect your iPad to your Mac via a USB cable, then click File > New Finder Window and select your iPad in the sidebar. Start to transfer your Spotify music files from your Mac to your iPad.
Step 2 Add Music to the Video in Final Cut Pro
Open your project in Final Cut Pro or create a project in Final Cut Pro. Then tap the Import from button and select Files. Then find Spotify music files and drag one into the timeline of your video.

Conclusion
Remember that you can add as many files as you want to a single project on Final Cut Pro not to mention the editing ability. Final Cut Pro makes perfect use of keyboard shortcuts, enabling you to freely move back and forth as you trim, drag, drop and range selection options as you wish. So, if you were asking whether you can add Spotify music to Final Cut Pro, the answer is a plain yes. Not only can you add Spotify music, but you can add effects, and group together audio and other clips. That’s also a perfect way to ensure everything stays in sync.
Get this product now:
Get this product now: