


Apple Music is available on iTunes and for iOS and Android devices. If you subscribe to Apple Music, you can stream over 70 million songs, download your favorite tracks, and get exclusive playlists and live radio. But most importantly, your purchased music, content you add from Apple Music or import to iTunes, and changes you make to your Library will sync across all your devices if you have a subscription to Apple Music. Well, we’ll show you how to enable Apple Music sync library on your devices.

Part 1. How to Sync Apple Music Library via Sync Library Feature
With a subscription to Apple Music, you can turn on Sync Library to access your library and songs that you’ve downloaded from Apple Music on all of your devices. With the latest version of iOS, iPadOS, and macOS, Sync Library is turned on by default. If you turn off Sync Library, you can turn it back on. Just follow the steps below for your device.
What You Need for Apple Music Sync Library
– Update your iPhone, iPod touch, iPad, Mac, or iTunes to the latest version.
– Subscribe to Apple Music or iTunes Match.
– Sign in to all of your devices with the same Apple ID that you use with Apple Music or iTunes Match.
– Connect your devices to the Internet over a Wi-Fi or cellular network.
• On iPhone/iPad
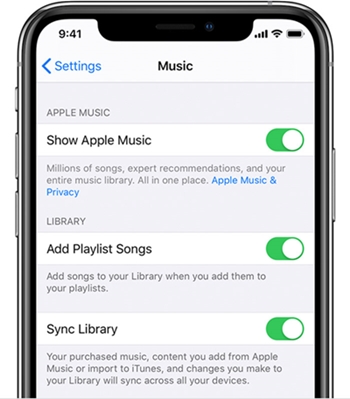
Step 1. Power your iPhone, iPad, or iPod touch on and go to Settings > Music.
Step 2. Turn on Sync Library then the content you add from Apple Music will sync across all your devices.
• On Mac
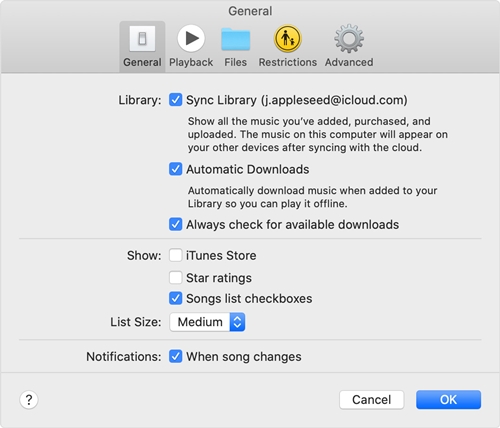
Step 1. Open the Apple Music app and choose Music > Preferences from the menu bar at the top of your screen.
Step 2. Click the General tab and select Sync Library to turn it on then click OK.
Note: If you find that sync Apple Music feature not working, here we prepared some solutions for you to have a try.
1. Turn Sync Library on and off on all of your devices.
2. Update iPhone, iPad, iPod touch, Mac, or iTunes for Windows to the latest version.
3. Connect your devices to the Internet and turn Use Mobile Data on.
Part 2. How to Sync Your Library on Apple Music via iCloud
Apart from the Sync Library feature, there is another function that can help you sync the music library on Apple Music. That is iCloud. After you enable it, the songs you added will be automatically synced.
• On iPhone/iPad

Step 1. Open your iPhone or iPad and go to Settings.
Step 2. Tap your Apple ID at the top. Then scroll down and choose iCloud.
Step 3. Tap Show All under the APPS USING ICLOUD section.
Step 4. Find Music from all listed apps on your phone. Then switch the button on to make sure that you enabled the iCloud sync feature of Apple Music.
• On Windows
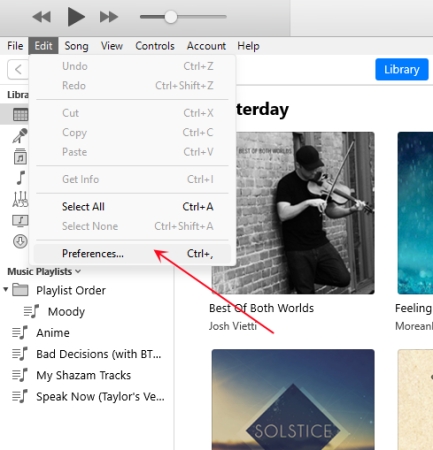
Step 1. Launch iTunes and choose Edit > Preferences from the menu bar at the top of your screen.
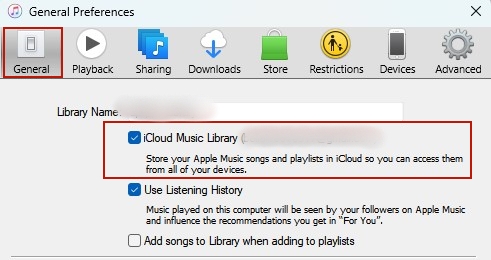
Step 2. Go to the General tab and select iCloud Music Library to turn it on then click OK.
Part 3. Alternative Method to Sync Apple Music Library
Apple Music has a convenient built-in feature you can use to transfer your library to your devices. However, if you sign out of your Apple ID or cancel your subscription, you are not able to access and sync your music library on all of your devices. Consequently, the music that you’ve downloaded from Apple Music cannot be accessible on your devices.
In addition, Apple Music isn’t a backup service. So, you need to have a copy of your music and other content in case your device is ever replaced, lost, or damaged. What if you want to sync and make a copy of your library once? Fear not, as that’s just as easy to do. Thankfully, the Tunelf Audio Converter could complete this special task.
It’s not uncommon for Apple Music can be accessible on the specified device or platform. Here Tunelf Audio Converter removes the limitation from Apple Music and converts them into six popular audio formats like MP3. Then you can transfer DRM-free Apple Music files to any device and upload them to those cloud platforms for backup.
Key Features of Tunelf Audio Converter
- Convert Apple Music to MP3, WAV, FLAC, AAC, and other audio formats
- Remove DRM from Apple Music, iTunes audios, and Audible audiobooks
- Preserve the converted audio with lossless audio quality and ID3 tags
- Support the conversion of audio format at a 30× faster speed in batch
Step 1 Select your Apple Music files
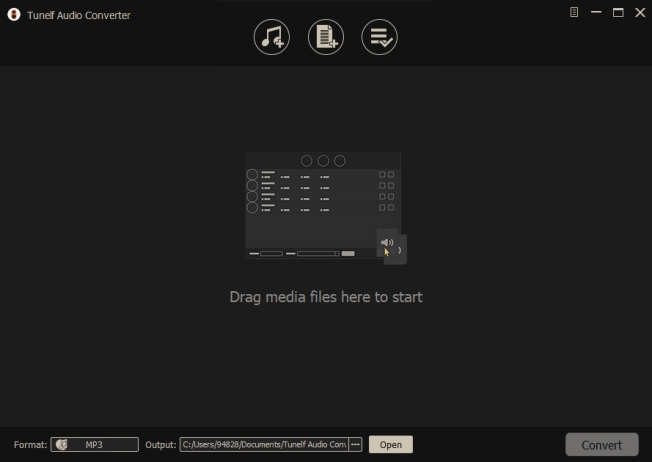
Launch Tunelf Audio Converter on your computer, and meantime iTunes app or Apple Music app will load automatically. Then you can click the Add icon to import Apple Music files you want to convert to the program. Or you can simply drag and drop your target audio files from Apple Music to the Tunelf interface.
Step 2 Customize your output settings
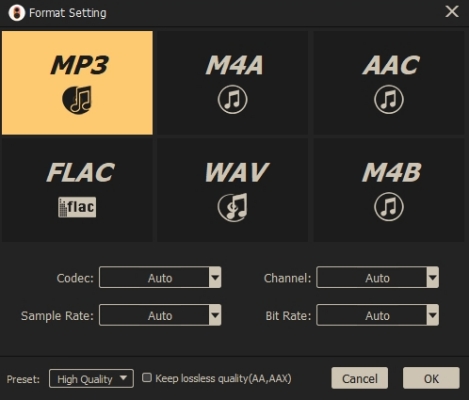
Once your Apple Music files are loaded into the Tunelf app, click the Format icon at the bottom left-hand corner. A window of format setting will appear where you can set the output format, codec, channel, sample rate, and bit rate. The converter supports the output formats including MP3, AAC, M4A, M4B, FALC, and WAV.
Step 3 Start to convert Apple Music files
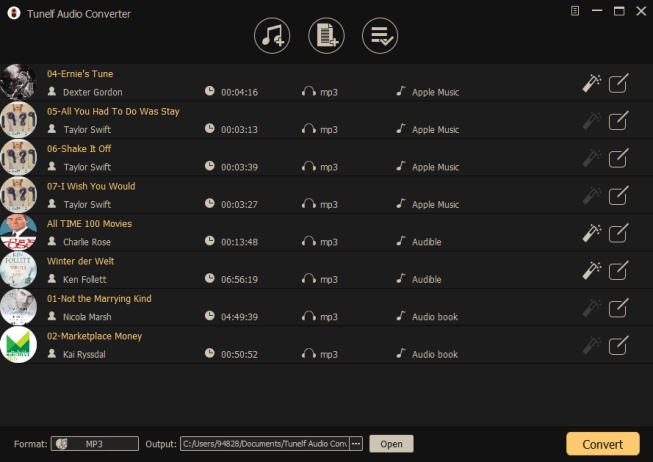
After all your settings are done, you can now click the Convert button and Tunelf Audio Converter will automatically convert Apple Music songs to MP3 or other audio formats you want. You can then locate all your converted Apple Music files by clicking the Converted button and begin to make a backup or sync Apple Music.
Part 4. FAQs about Apple Music Sync Library
Q1. Can I put the Apple Music library in iCloud?
A: Without hesitation, the straightforward answer is yes. If you subscribed to Apple Music, you can store up to 100,000 songs in your iCloud Music Library.
Q2. Why I can‘t sync the Apple Music library from my Mac?
A: Sometimes when you try to sync the Apple Music library on your Mac, you may see an error like -5000, -69, 13010, or 13014. You can take the steps below as a reference.
1. Make sure that your macOS is updated to the latest version. If it is not, update it and try to sync again.
2. If your music files are stored in different locations on your computer, you can try to consolidate your files. Then, try to sync again. Because the syncing process will become more simple after you do that.
3. Sometimes there may be third-party security software that interferes with the syncing process. You can fix it by changing your software’s settings.
4. Another cause is that some specific songs are corrupted. You can sync a few songs at a time and add more until the errors appear again.
Q3. Why my songs are missing after I turn on Sync Library?
A: First of all, you should make sure that all the Sync Library features on your devices are turned on. Also, your Apple Music subscription should be active. Then, you can find the solution by checking the songs’ cloud status.
1. Open the Apple Music app on your Mac or the iTunes on your PC.
2. Click Library, and then select Songs in the sidebar.
3. Choose View > Show View Options > Cloud Status and Cloud Download. Next, you can see the statuses next to all your songs and know how to do them.
Bottomline
Now you can access your music library across all of your devices. It’s easy to enjoy your music library from multiple devices even though you add new content or purchase some tracks. If you’re looking for more in-depth syncing and content organization, consider using Tunelf Audio Converter instead. With Tunelf Audio Converter, you’re able to freely use your Apple Music downloads and listen to them on any device.
Get the product now:
Get the product now: